Four hour length tutorial on how to model a building for 3d interactive visualization
Among all the techniques used to create 3d models for visualization, the most used for architectural visualization is edge modeling followed by subdivision modeling. The edge modeling technique is the one that provides the highest level of control over precision and allows the artist to set measurements and divisions based on planes. It’s quite easy to work only with the parts of the project that will be actually showed up on the rendering. With subdivision and the work with 3d primitives, we have to erase lots of faces and vertices to clean up the model.
To master those techniques we have to practice a lot and watch a few examples of 3d architectural created with both methods. If you want to learn a bit more about edge modeling and subdivision for architecture, I just found a great and detailed tutorial about that and with more than four hours in length!
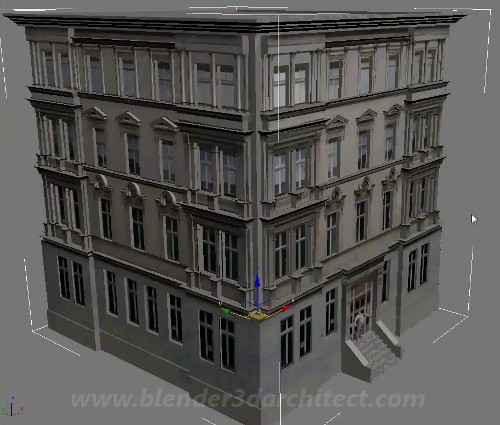
The tutorial was created with 3ds Max 2009, but most of the tools and techniques can be applied to almost any 3d package, including Blender 3D poly modeling tools. This project was created to show an example of how a model can be exported from 3ds Max to CryEngine 2 for interactive visualization. Here is a view of the final model:

The video is divided in three parts that can be watched directly in Vimeo or downloaded in MP4. Depending on the method, you should be prepared for a long download, since the full tutorial has more than 2GB in size.
Here are the links to watch the tutorial in Vimeo:
- Modeling a building – part 1
- Modeling a building – part 2
- Modeling a building – part 3
At the description page on Vimeo, you can find other options to download the videos.
In the first video we can check out how the author creates the walls, windows and details of the ornaments of the model like plate rails. The modeling process uses a mix of subdivision with edges. When we get to the second part of the tutorial, the author starts to work on the UV mapping of the model in 3ds Max to export and work on the unwrapped map on Photoshop.
At the last video the 3d model is finally exported to CryEngine to create an interactive 3d visualization. The 3d model doesn’t have much detail to save polygons and increase the performance at the 3d engine. Even not being directly aimed to architectural visualization artists; it’s a good and detailed tutorial about modeling and should be watched by anyone involved with 3d modeling.
I will recommend the material to all my students!


thanks alan! seems to be very interesting and educating for me as a blender user! its worth comparing my own workflow with the worklflows of pros. i´ll definitily check out the video in my spare time.
regards
johannes
Hallo Allan,I’m Santo.I’m a freelance architect
& Viz Artist. I’ve been looking for a method to
make virtual reality presentation in my works.
Nice tutorial…
How can I get Cry Engine & Sandbox Editor??
Is it a free-ware or propietary?
Thanks,sorry for my English.
@Santo
It’s the engine from the PC game Crysis. The sandbox editor ships with the game but be warned you cannot use it for legally for commercial projects without paying a license fee in the million dollar range.
Thanks for the links on this… Looks interesting… Watching the first part though, I was wondering if it’s possible in Blender to overlay an image and edit it in that way? I would probably have to load the image into a view as Background and then estimate from there, is that right?