Customize Consent Preferences

We use cookies to help you navigate efficiently and perform certain functions. You will find detailed information about all cookies under each consent category below.

The cookies that are categorized as "Necessary" are stored on your browser as they are essential for enabling the basic functionalities of the site. ... 

Always Active

Necessary cookies are required to enable the basic features of this site, such as providing secure log-in or adjusting your consent preferences. These cookies do not store any personally identifiable data.

No cookies to display.

Functional cookies help perform certain functionalities like sharing the content of the website on social media platforms, collecting feedback, and other third-party features.

No cookies to display.

Analytical cookies are used to understand how visitors interact with the website. These cookies help provide information on metrics such as the number of visitors, bounce rate, traffic source, etc.

No cookies to display.

Performance cookies are used to understand and analyze the key performance indexes of the website which helps in delivering a better user experience for the visitors.

No cookies to display.

Advertisement cookies are used to provide visitors with customized advertisements based on the pages you visited previously and to analyze the effectiveness of the ad campaigns.

No cookies to display.

Blender 4.2: Precise Modeling Workshop
Learning Resources →

In the past few days I was reviewing some projects created with old versions of Indigo Renderer, to start working on updates and see how fast the last releases are compared with the old freeware Indigo. In one of those projects I saw something that caught my attention, which is the way glass is created in Indigo. I remember that by the time I start to use Indigo, I wasn’t able to create glass. So, how can we create glass in Indigo? Well, first of all we have to follow a simple rule to create glass in Indigo that is all glass objects must have a volume.

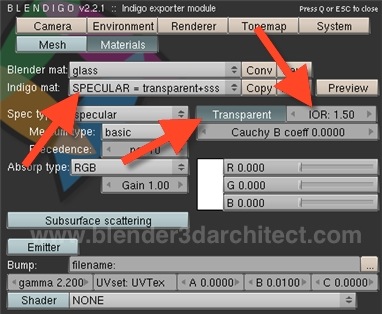
For instance, we can’t use a plane as a glass object. Always choose objects such as a cube or box. To create a glass material in Blendigo, we have to choose a material type called “SPECULAR = transparent+sss”, and press the Transparent button.

architectural-glass-indigo-render-01.jpg

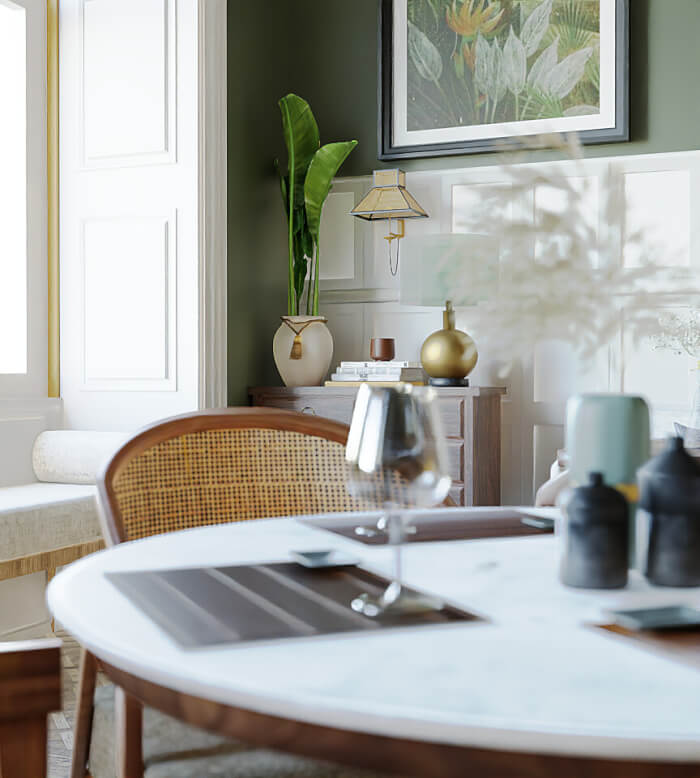
Change the IOR to something close to 1.5 and we will have a nice glass material to be used in windows, doors and others parts of an architectural visualization project that require glass. Here is a render test create with a simple window, and a box resized to simulate the glass of a window.
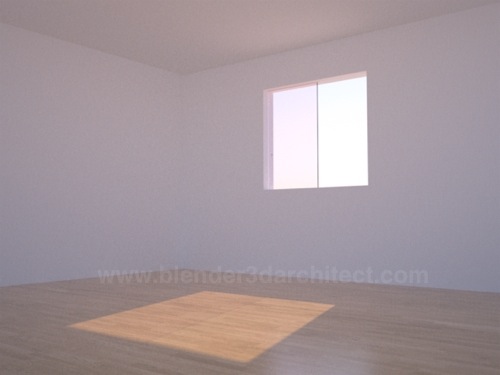
architectural-glass-indigo-render-02.jpg

If the same scene were rendered with a plane instead of the box, we would have a black plane on the image.
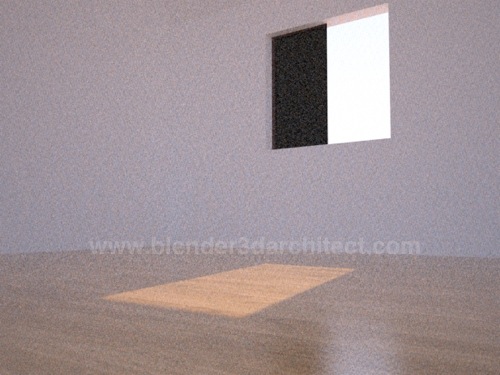
architectural-glass-indigo-render-03.jpg

What about colored glass? In a previous article I talked about colored glass for YafaRay, and the way we can easily create colored glass in Indigo is by picking a color at the selector pointed in the image below, and changing the Gain factor to more than one. This is the amount of color blended with the glass material.
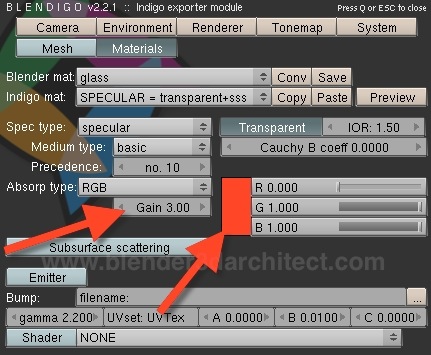
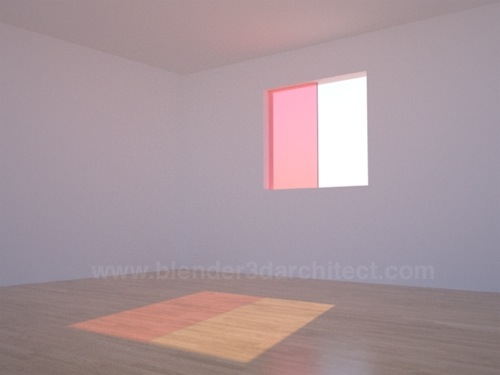
architectural-glass-indigo-render-04.jpg

architectural-glass-indigo-render-05.jpg

And since it’s all about testing the glass material, I decided to create a colored panel with several types of glass. After a few interactions, we can see that the most annoying objects from unbiased render engines appears; fireflies!
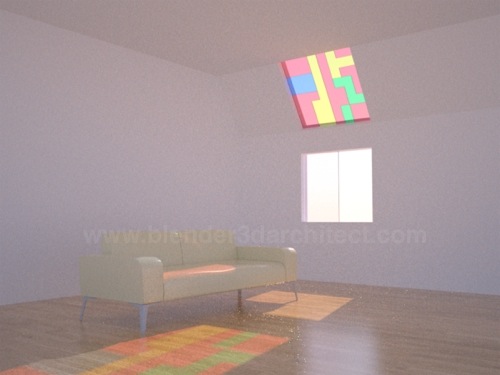
architectural-glass-indigo-render-06.jpg

To get rid of the fireflies I will have to render the image again and turning on Metropolis sampler. I was turning of Metropolis to speed up the render, but in this case it will be better to test the scene again.

Blender 4.3 for Complete Beginners (Workshop)
Previous

Animation for architecture: Creating growing architecture

Next

Guide about interior lighting for architecture with Blender 3D or YafaRay

Leave a Reply

This site uses Akismet to reduce spam. Learn how your comment data is processed.

Check Also

Clicky