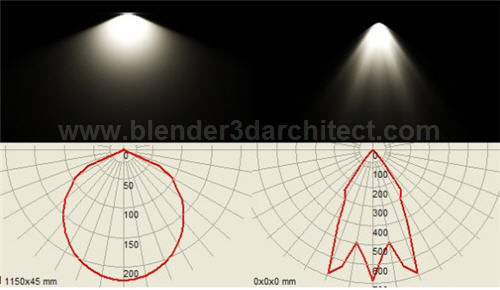
Quick guide on how to setup IES files for rendering in Indigo Renderer
For architectural visualization artists, no matter what type of renderer is used to create the project, always have quite a challenge to fulfill the expectations from their clients, and represent with the most realism the lighting of a scene. Almost all renderers today offer the possibility to use a special type of file, applied to a 3d model called IES light. It’s a text file that store information about the behavior of a light source. If it’s used to render a scene, the result will be a close result to what should be created with the real light source.
If you never worked with IES files, I just found a great guide about how to use IES files with Indigo Renderer, which may be useful for artists using both Blender 3D or SketchUp for architectural visualization. With Indigo, we can use this type of light source with both softwares using a similar technique.

A nice thing about the short guide that has only two pages is that the author goes straight to the point explaining the meaning of IES, and pointing the best way to use the lights. If you have ever used IES lights in LuxRender, the technique looks almost the same in both softwares. We have to create an object, and at the materials tab of the renderer select an option to make the object emit light. And if we assign an IES file to the material, it will use the properties of the IES profile.
At the same link provided for the guide, it’s possible to find a small set of IES files to download and use in our projects. And, if you want to visualize the data from the IES files without the need of a renderer, we will find a free software to download called IES Viewer, which allows us to check the properties of a IES file before assign it to any object in our projects.
In my projects, I always use a small plane scaled down to be almost invisible during the final render. For artists using Blender 3D, in a short time we will have another option to use IES files with YafaRay.


