
There are a lot of examples and projects about Blender and Cycles for architecture related to interior visualization. But, only a few of them deal with natural light sources like the sun. A few days ago one of my students ask me about the setup for a daylight scene in Cycles. He said that there weren`t any kind of information about that on the web, and after a few searches I really couldn`t finds anything related to that. Not even on Blender 3D Architect! Shame on me!
So, how can we setup a scene a scene for natural sunlight with Cycles for architecture? Is it hard? What`s the secret?
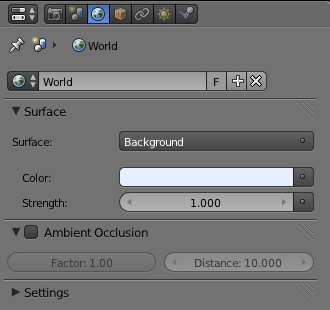
The basic setup of any scene for Blender Cycles that should use natural sunlight is made by the sum of a background color and a Sun Lamp. The background of the scene should use a solid color; I like to use a light blue. If you want the exact color, try the R: 0.8, G: 0.86 and B: 1.0. The strength of the background may change depending on the scale of your project, but I usually start with something around 1 or 2 units.
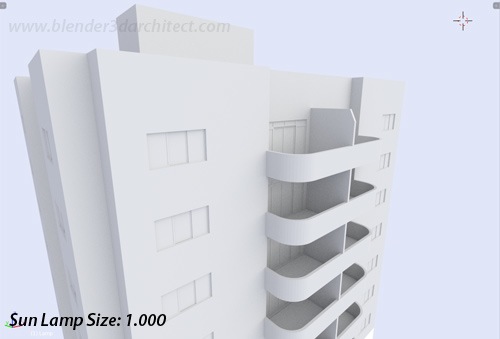
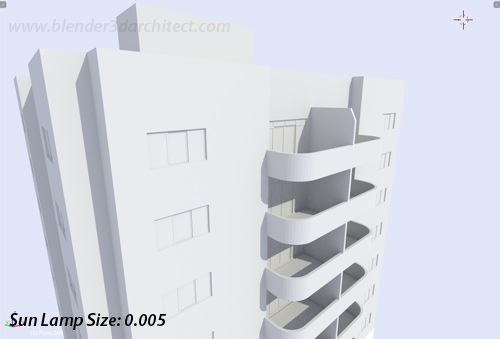
Then we have the Sun Lamp, which is fully supported by Cycles. If you ever tried to use a Sun Lamp in Cycles, you probably noticed that the Sun Lamp generates soft shadows by default. And for external light sources like the sun, we need hard edge shadows. What controls this for the Sun Lamp in Cycles is the size parameter. By default your Sun Lamp will start with a size of 1, which in this scenario is really big. A small Sun Lamp will generate hard edge shadows, and I mean really small like a Sun with the size of 0.005. The strength of the Sun will also vary depending on the scale of your scene. I usually start with 2, but you should play around with the values to find the best strength for your project.
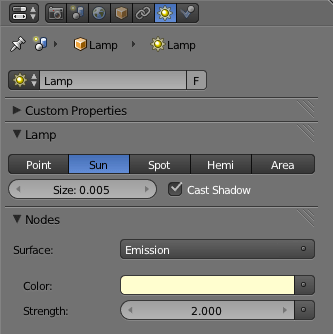
And that is it, just pick a color like a light yellow for the Sun and you are all set.
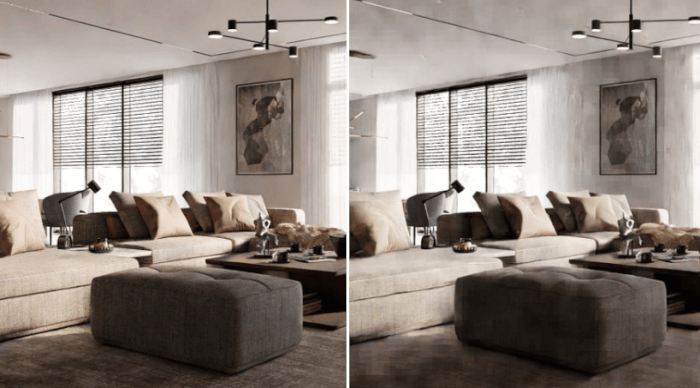
Below you will find a quick example of the same scene rendered with a Sun Lamp with sizes of 1 and 0.005.
I hope you like it! Now you know the secret to setup sunlight with Blender Cycles. This is just a basic tutorial, but should work as a starting point for your projects.



It’s a shame we still don’t have a sun positioning addon. For real solar studies we’re still left in the dark.
Ótimo post. Estava procurando justamente por esta explicação.
Blender HAS a sun positioning addon, see here:
http://wiki.blender.org/index.php/Extensions:2.6/Py/Scripts/3D_interaction/Sun_Position
It works great, you also can link a HDR to it.
Kind regards
Alain
@Allan
Why don’t you use a Sky Texture instead of a simple color for Skylight ?
There is a default Sky Texture in Blender, I always use this.
You also can use HDR’s but be careful with it because it slows down the rendering and produces more noise.
Kind regards
Alain
Well, I’ll be dipped! Thanks for the info, Alain!
@Alain
I`m aware of the Sky texture and HDRs
I just thought it would be easier to setup a scene with only a solid color. It`s just like you said, using resources like hdr images, you must find a way to clean up the noise.
Anyway, there are lots of ways to setup the background
Thank you for your tips.
Sun lamps seem to be broken, I can’t get anything out of my glass shaders
My sea floor looks black if I put in a standard emission object everything looks fine.
can you confirm?