
Almost all artists that start a visualization project want a photo real result at the end. There are a lot of ways to get that result with external renderers, great textures and some other tricks. But, one of the first things that you should do to improve your scenes is to chamfer all edges in your model. Yes! That's it; with a simple chamfer you can make the difference. Why? One of the goals of a photo real image, is to make people think that the image, wasn`t produced by a computer.
All images produced by computers with software's like Blender 3D, end up to be perfect images. With the Bevel modifier of Blender 3D, we can add a bit of imperfection to the edges of your scenes. Just take a look around you, and you will see the edges of walls, windows and doors with small imperfections, that look like chamfered edges.
How to do that in Blender 3D? Let`s take a look!
The bevel modifier is pretty simple to use, but to apply the chamfer to only a few selected edges, we have to use a property called Bevel Weight.
For this example, I will use a simple model of a wall.
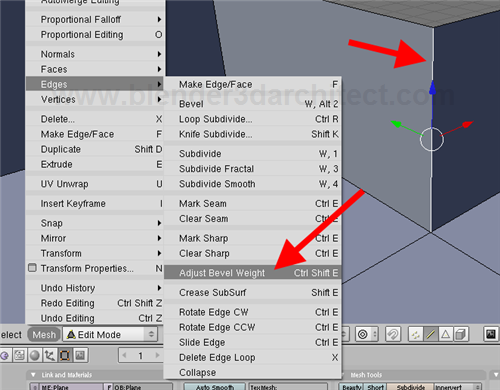
When I select the bevel modifier and apply it to the wall, all edges of the model receive the chamfer. But, I only want it in the edge pointed at the image above.
Here is what we have to do:
- Enter in Edit Mode and select only that edge
- When the edge is selected, press the CTRL+SHIFT+E keys to change the bevel weight (or use the menu Mesh -> Edges -> Adjust bevel weight)
- Move your mouse to change the weight value, and right click once to finish
That's it! Now go to the modifiers panel and choose the limit option of the bevel as BevWei. Make a few tests with the weight value, to find the amount of chamfer that best suites your model.
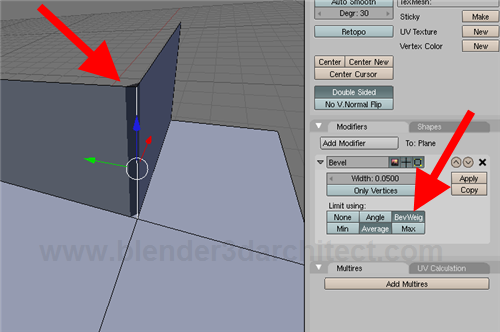
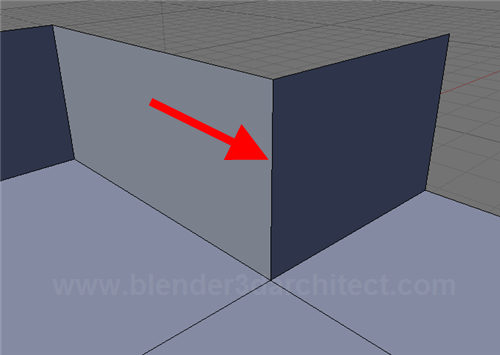
Now the selected edge of the model is chamfered!
You can control the amount of chamfer, with the width parameter.



wow! i didn’t knew!! =) nice thing!
Thanks a lot! That’s a really good tip, I didn’t even notice that before!
Thanks this is awesome I’ve been looking for a way to chamfer edges in Blender for a year!
thank you so much for your blog! I’ve subscribed and will save all your tutorials!! Blender FTW! ;p