For artists that must work with Blender every day to make architectural visualization images like us, any opportunity to save time and add new features is welcome. The easiest way of doing that is with the use of Add-ons. If you are new to Blender, an Add-on works like a plugin that you install to work with the software. The Add-on can help you in many ways, like improving modeling tools or even offering new render engines.
Some of those Add-ons are free to download and use, and others require a purchase. Depe
In architectural visualization, we have a couple of Add-ons that we can easily say are a must-have for giving us shortcuts and new tools to save an incredible amount of time in projects. One of those Add-ons that can easily appear in any “must-have” list is the Photographer from developer Michel Chafouin.
As the name implies, it is an Add-on that transforms your camera controls in Blender by expanding the options with a lot more controls like:
- Exposure using real camera settings (ISO, Aperture, Shutter Speed) or more artist-friendly controls (EV value)
- Motion Blur control using Shutter Speed or Shutter Angle
- White Balancing with viewport picker
- Resolution per camera with artist-friendly presets
- Autofocus (Single, Continuous or Tracking)
- Camera list and Master Camera that can switch between cameras
The Add-on has two main versions at the moment:
What is the difference? With version 3, you get a lot more features like Physical light units and Auto Exposure for your Viewport. The premium version receives frequent updates in comparison to the free Add-on.
In the future, we will post more information about the features present on the premium version.
What do you get with the Photographer 2? First, you must download the Add-on from Gumroad. It uses a “fair price” model where you can give the author any value before a download. It accepts even a value of zero, which triggers a free download.
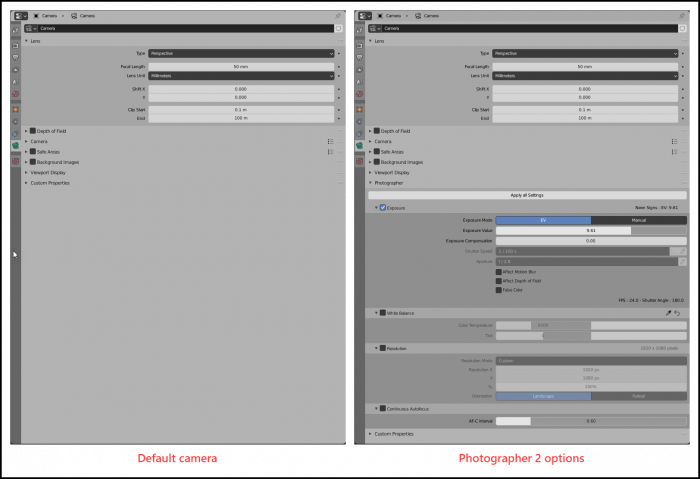
After downloading it and installing the Add-on in Blender, you will see a lot of new features in the camera settings. Here is a comparison:
Here are only the options available for Photographer 2:
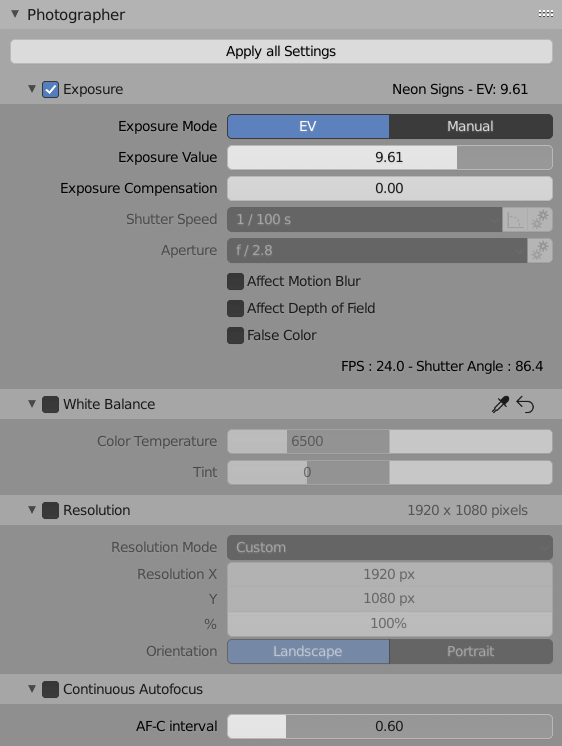
As you can see from both images, you get a significant upgrade in camera settings for Blender. That is a huge help in architectural renders because a camera with optimized settings improves realism.
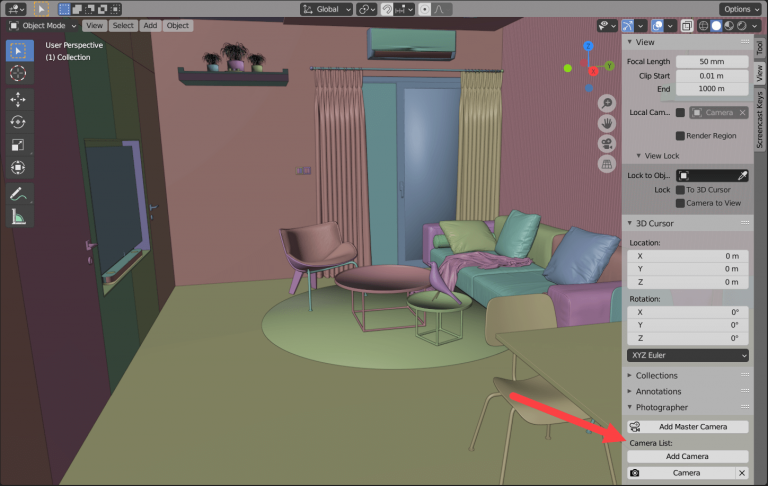
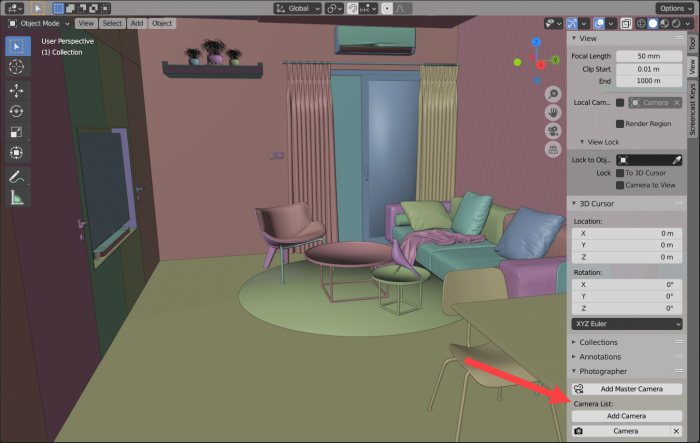
For instance, you can control aspects such as Exposure and White Balance with extended settings. One little feature that we find particularly useful in Photographer is the ability to add new cameras on the fly. If you open the 3D Viewport Sidebar, you find new options to add and manage cameras.
If you find a new viewing angle to render, press the “Add Camera” button to create a new camera aligned with that view. Below those buttons, you also have a list of all existing cameras at the scene.
Like we mentioned before, Photographer 2 is one of the most useful Add-ons to handle cameras for Blender and architectural projects. Did I mention it is a free download?
By the way, the free version works fine in Blender 2.90.
Using Blender for architecture
Do you want to use Blender for architecture or render your projects using Cycles or Eevee? We have three books available that could help you!
They cover the use of Blender for producing architectural content and also all information you need to render projects in real-time:
- Blender 2.9 for architecture: Modeling and rendering with Eevee and Cycles
- Blender 2.8 parametric modeling: Drivers, Custom Properties, and Shape Keys for 3D modeling
- Blender 3.0: The beginner's guide
- Blender 2.8 for technical drawing
- Blender Eevee: The guide to real-time rendering with Blender 2.8
You can get them in both digital and paperback formats. By ordering those books, you will not only improve your skills with Blender for architecture but also support Blender 3D Architect.

