As an artist working with architectural visualization, you will have to build an extensive library with assets that will help you to set up a scene quickly. From HDR maps to PBR textures, you will need all those assets.
Nowadays, it is easy to find online libraries offering those resources in creative commons zero.
That is great to save costs on making an asset library, but it might cause you some trouble finding and keep track of all updates from those libraries.
To help you download the latest updates on textures, we often make lists with the new releases from several of those libraries.
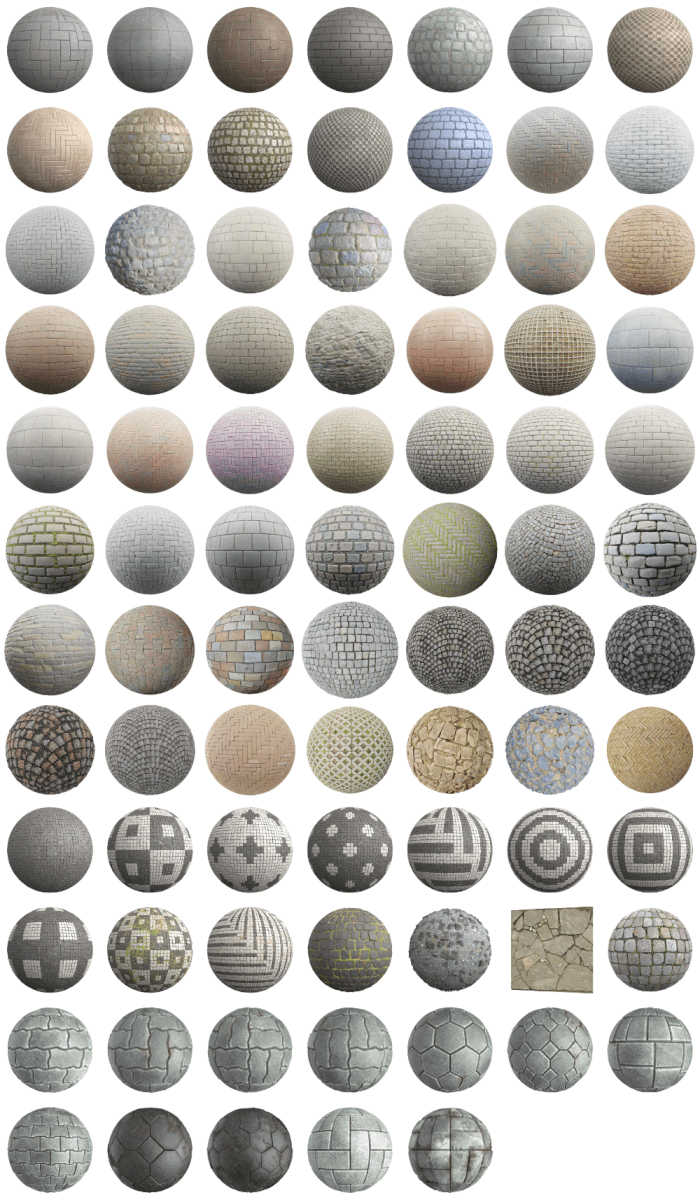
Here is a pack with 83 new textures you should download:
- PavingStones001
- PavingStones002
- PavingStones003
- PavingStones004
- PavingStones005
- PavingStones006
- PavingStones007
- PavingStones008
- PavingStones009
- PavingStones010
- PavingStones011
- PavingStones012
- PavingStones013
- PavingStones014
- PavingStones015
- PavingStones016
- PavingStones017
- PavingStones018
- PavingStones019
- PavingStones020
- PavingStones021
- PavingStones022
- PavingStones023
- PavingStones024
- PavingStones025
- PavingStones026
- PavingStones027
- PavingStones028
- PavingStones029
- PavingStones030
- PavingStones031
- PavingStones032
- PavingStones033
- PavingStones034
- PavingStones035
- PavingStones036
- PavingStones037
- PavingStones038
- PavingStones039
- PavingStones040
- PavingStones041
- PavingStones042
- PavingStones043
- PavingStones044
- PavingStones045
- PavingStones046
- PavingStones047
- PavingStones048
- PavingStones049
- PavingStones050
- PavingStones051
- PavingStones052
- PavingStones053
- PavingStones054
- PavingStones055
- PavingStones056
- PavingStones057
- PavingStones058
- PavingStones059
- PavingStones060
- PavingStones061
- PavingStones062
- PavingStones063
- PavingStones064
- PavingStones065
- PavingStones066
- PavingStones067
- PavingStones068
- PavingStones069
- PavingStones070
- PavingStones071
- PavingStones072
- PavingStones073
- PavingStones074
- PavingStones075
- PavingStones076
- PavingStones077
- PavingStones078
- PavingStones079
- PavingStones080
- PavingStones081
- PavingStones082
- PavingStones083
You can download all those resources directly from each one of the sites. The highlight of this list is a wide variety of choices for Paving Stones. Mostly to use with Exteriors.

Here are some other libraries of materials that you might want to download:
- 12 Free PBR textures for interiors (Tiles)
- 13 Free PBR textures of Tactile blocks for architecture
- 14 free PBR textures and HDR maps (Facades and walkway)
- 11 Free PBR materials and HDR maps (Tiles)
- 12 free PBR materials and HDR maps (Concrete)
- 10 free PBR materials and HDR maps (Rocks and Bricks)
- 16 free PBR textures and HDR maps (Rock and Wood)
- 15 free PBR textures and HDR maps (Bricks and Leaves)
- 9 Free PBR textures for architecture (Wood and Parquet)
- 11 Free PBR materials and HDR maps (Tiles)
- 12 free PBR materials and HDR maps (Concrete)
- 100 free PBR materials for architecture
- 15 Free trees and brushes cutout textures
- 10 Free PBR textures with plastics
- 497 free PBR materials for architecture (up to 4k)
- 10 Free PBR textures for architecture (Bricks)
- 10 Free PBR textures with plastics
- 23 PBR Textures for architecture (Floors)
- 205 Free PBR textures for architecture
- 42 PBR Textures for architecture (Fabrics)
- 14 PBR Textures for architecture (Carpet)
- 39 Free PBR textures for architecture (Wood)
- 23 Free PBR textures for architecture (Parquet)


