A long time ago you only could render architectural projects with Blender using either “Blender Internal” or “YafaRay.” By the time I started using Blender, I believe was around version 2.34, it even had a default tab for YafRay without the middle “a.”
Today, you have a broad range of options to choose a renderer. The easiest is Cycles, but lots of commercial render engines have exporters nowadays. For instance, architectural artists migrating from tools like 3dsmax, have the option to render with V-Ray and save themselves from the need of a subscription with Autodesk.
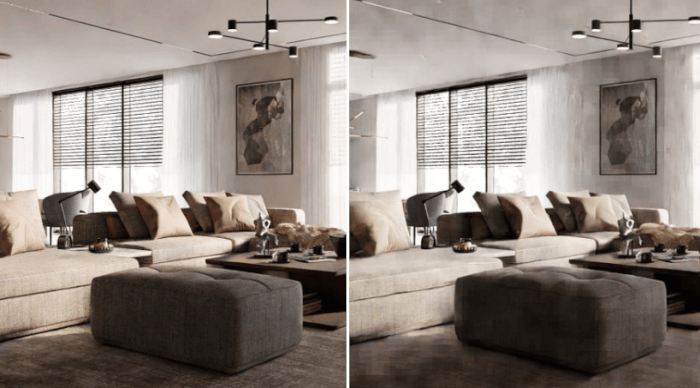
A render engine called Corona is also among the dozens of commercial options compatible with Blender. Do you want to see a comparison between renders made with both Corona and Cycles?
An artist from German based studio xoio-air just did that and wrote an extensive article describing the pros and cons of his experience. Follow this link to read all impressions about using Blender with Corona Render.
Let me give you a spoiler about the text. The overall experience was quite positive.
If you take a close look on all renders from Cycles, you hardly can't distinguish the images. Take some time to read the full article, because it is quite long.
Using Blender to render 2D architecture
Have you ever imagine yourself using Blender to render more than realistic images? What about technical drawings with dimension lines and all architectural symbols?
That is possible with the use of FreeStyle and the correct set of options. From Render Layers to Styles, you can learn how to create such renders at our course about architectural documentation with Blender and Freestyle.