In our past recommendations, we talked about hardware options for architectural visualization. Today we will approach a different subject, which is books.
Our goal with this recommendation is to offer you material to improve your architectural visualization skills and business opportunities. Yes, business opportunities! If you choose wisely the types of books you read, you will get insights on how to add value to your work.
Books about architectural visualization
What types of books should you read about architectural visualization? If you go to any large book retailer and do a search about architectural visualization, you will notice something peculiar. Almost all titles have a direct relation to software, which makes sense.
Are there any books about architectural visualization not related to software?
Yes, but we have to clarify one thing first.
Let's take a moment to think about what exactly we do with architectural visualization. When you create images for a particular project, you are indeed producing marketing material.
Unlike most people think, you are not in the digital art business. You are working with marketing. Just think about the impact of your renders in the construction, furniture, and real-estate market.
With that in mind, we can go back to the book's discussion. What books would a professional from the architectural marketing need?
Since you will help to sell real estate, both existing ones, and projects we should focus on that kind of material. By narrowing down our search to real estate, we can get to more options related to the architectural visualization business.
To be more precise, we can go for real estate photography! If you take a close look at that subject, a real state photographer works similarly. The obvious difference is that they need an existing property, and we can create it digitally.
In both cases, you have to work with:
- Framing
- Composition
- Lights
- Furniture
- Presentation
All those aspects will help you sell either a project or an existing property. If you improve those aspects of your architectural visualization work, you most likely will make better marketing material. And boost your customer's sales.
Recommended books
With all that in mind, what titles do we recommend? Here is our list:
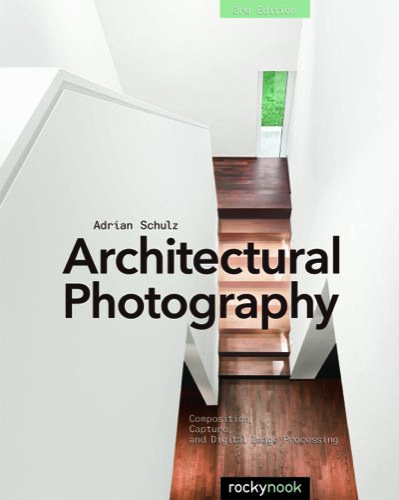
- Architectural Photography, 3rd Edition: Composition, Capture, and Digital Image Processing (Top pick) – From all titles in the list this is our choice if you consider reading only one of them. They talk about all relevant aspects of architectural photography that will help with your business.
- Photography for Real Estate Interiors: How to take and create impressive interior photos – Going to the real estate side, you will find a lot of useful information related to both marketing and photography.
- Photographing Architecture: Lighting, Composition, Postproduction, and Marketing Techniques – If you want a book that will deal with topics in a more close way to marketing, choose this title. They will slightly drive the approach to teach you about marketing strategies.
- Mindset, Model, and Marketing!: The Proven Strategies to Transform and Grow Your Real Estate Business – Do you want a book only about real estate marketing? This title has a focus only on that subject. It is a bestseller in that field.
Most of those titles offer an electronic version, which has a significant discount.
And there is this other book about Blender:
- Blender 3D 2.49 Architecture, Buildings, and Scenery – Yes, a book about Blender for architectural visualization. From the title, you will realize how outdated the book is at the moment. It still uses Blender 2.49 and YafaRay as main render engine. Do not buy this book, unless you want to go back in time.
Do I have plans to update the book?
That is up to the publisher. When you sign a contract to write a book with a big publisher, they have control over that title. Unless they want to update, I cant do anything about it.
However, due to the outdated version of Blender, it is unrealistic to go for a simple update. I would have to rewrite it from scratch. In that case, a new a new title would be a better choice.
You now have our recommendations! Take this opportunity to expand both your knowledge and business opportunities in architectural visualization.
Disclaimer: Some of the links above might be affiliate links, meaning, at no cost to you, we earn a commission if you click through and make a purchase. If you decide to purchase using our links, you will be helping us with the maintenance of Blender 3D Architect. Thank you for your support!


